We have received your details and will be in touch soon.
Linkalist
Building Better Apps
August 13, 2019
Following on from our previous article, now that you have a basic list working, it's time to make it a little more useful for your customers. So firstly, we're going to have a look at the view columns. To do this, you need to click into the "Settings" tab and click into "views" to start editing your view.
View Columns
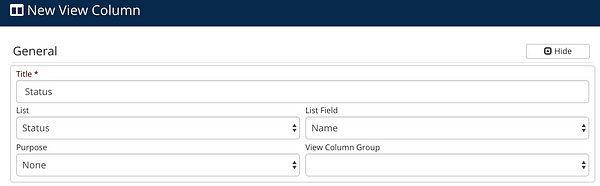
So the first thing we want to do is make the view columns a bit more useful. To start working on this, you'll need to click into "columns" and start modifying these. The first thing we'll do here is add in the work item status since that would be a useful piece of data to see. Once you've set this up, click Save. There are loads of extra options in this dialog but for now you don't need to worry about them.
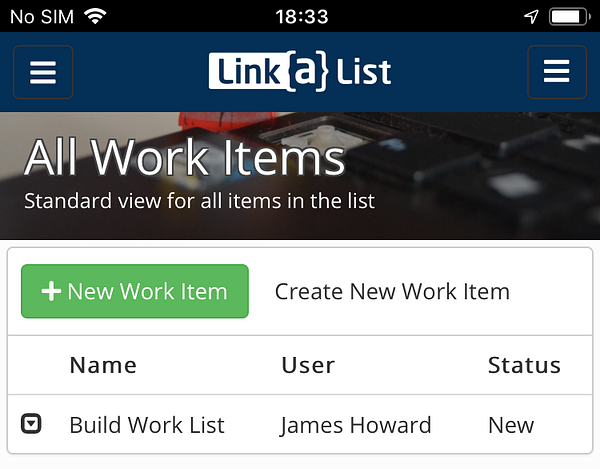
Next, we should remove the id column. This is added by default but we don't really need to see it in the list. This fairly simple - just click the delete button on the column.Now, when you you load up your application, you should see something like what is below.
View Conditions
The next thing we're going to look at is view conditions. These allow us to remove some list items from our view.
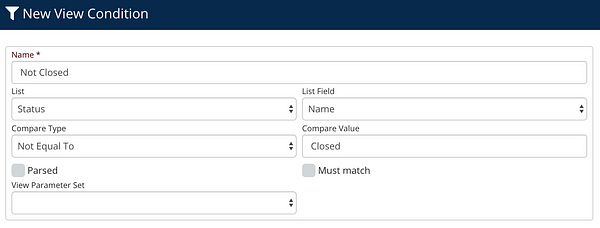
So, in our example, it might be nice to not have closed tasks cluttering up our view. So, let's go to our view conditions configuration, and add a condition to get rid of closed work items. You must remember that each view condition is used to define which items appear in our view, so what we want to do is add a condition of Status being Not Equal to "Closed". Now, if we go back to our "All Work Items" list, we'll see that not a lot has changed. But if we now go into our item, edit it and change the status to "Closed", when we return to the list, our item will be gone - no longer cluttering up the view with items we're done with.
Copying Views
This presents us with another issue - how do we go about viewing the closed items? The quickest way to resolve this is to copy our view and modify the condition. So, let's go back to our views for Work Items, and copy the "All Work Items". We should probably then change the name to "Active Work Items" and change the name of the new view to "Closed Work Items".
While doing this, we should remove the new view from the home page, and put in on the View Menu. This makes it so the view is now accessible on the right hand menu of the application.Finally, we need to go into the conditions for our new "Closed Work Items" view and modify the condition so that it is how checking the Status is Equal To "Closed".After all of this we'll end up with something like what's to the left where you can click on "Closed Work Items" to see closed items and "Active Work Items" to see the active ones.
Improving Usability
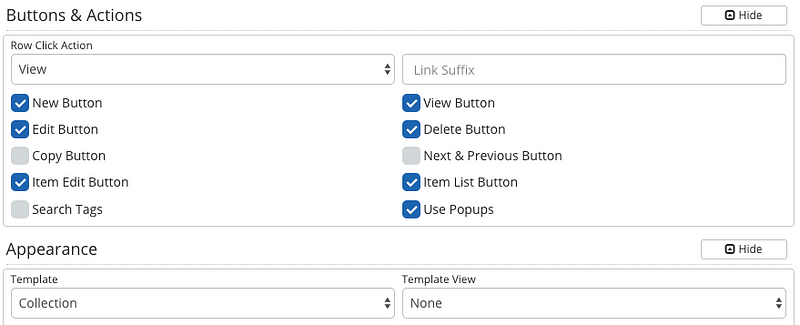
At the moment, our list view is a little clunky as we have to go to a new page to edit and item. While this works, it would be a lot nicer to be able to edit items using a popup. Luckily we can do this by editing some of our view settings.Now we need to go to our Settings page for the "Active Work Items" view.Here we need to do two things. Firstly, in "Buttons and Actions", we need click on "Use Popups" and in "Appearance" we need to change the template to "Collection". One you save those changes, editing a work item produces a popup like that below.Switching the template from Table to Collection implements a subtle change that is required for popups. In Table mode, the view is built entirely on the server and the data is delivered to the browser as a table in HTML. But in collection mode, only the page structure is built on the server and the data is sent to the browser separately. Then the list of items is built by code running on your browser. It is necessary to use the Collection mode for popups as the browser doesn't have enough data about your list items if the list is built on the server.So that is it for the basics of view configuration. We've only just scratched on the surface of what you can do with linkalist but the important thing is that you have made your app a little better.